
In this blog post, we will show you how to add horizontal and vertical lines to your resume using Microsoft Word. This is a very simple process, but it can make a big difference in the appearance of your resume. It is important to make sure that your resume looks professional and polished, and adding a line can help with that. We will walk you through the steps involved in adding a line, so follow along and see how easy it is!
How to Add a Line in Word Resume
1. Use AutoFormat
The quickest technique to create a horizontal line is with the AutoFormat function (which is not available in your word document software).
- After you’ve identified the point where you want to add a line, position your cursor there.
- Type any of these 3 symbols in a row:
- === (equal signs) for a plain double line
- — (hyphens) for a plain single line
- *** (asterisks) for a broken/dotted line
- ~~~ (tildes) for a wavy line
- _ _ _ (underlines) for a bold single line
- ### (number signs) for a triple line with a thick center
2. Press Enter
To adjust the vertical line, simply click on it once and drag it to a new location. If you wish to change the horizontal line’s width, double-click on it to open the Format Horizontal Line box, where you can modify the line height, width, alignment, and color.
3. Use the Horizontal Line Border
Another method to include a line in Word is to use a horizontal line border
- Place the cursor where you want to insert a line.
- Click on Home in the upper left corner.
- Select the Paragraph tool, then click in the Paragraph box. Click the down arrow next to the Borders button.
- Click on the Horizontal Line.
To move or reformat a horizontal line, double-click it. Click on the line once or twice to move or format it.
To remove a horizontal line border, choose No Border from the drop-down menu next to the Borders button.
If you want to add a horizontal line after all of your text, try this method.
How NOT to Use Word’s Lines Feature
When you’re trying to figure out how to add lines in Word, you don’t want to type in numerous underline symbols all across the page by hand. Not only is it time-consuming and prone to error, but doing so would undoubtedly make you appear amateurish, uncomfortable, and unprofessional which is definitely not the way you want to portray yourself on your IT Resume.
When you apply horizontal lines in the appropriate way, potential employers will be more inclined to take a closer look at your resume.
At a Glance
-Open Microsoft Word and open your resume document.
-Click on the “Home” tab at the top of the screen.
-In the “Paragraph” section, click on the button that says “Show/Hide.” This will show you all of the hidden characters in your document, including spaces, tabs, and returns.
-Click on the spot where you want to insert a line.
-Press the “Enter” key on your keyboard. This will create a new paragraph.
-Type out the text that you want to appear on the line.
-Click on the “Home” tab again and click on the “Show/Hide” button to hide the hidden characters.
-Save your document and you’re done!
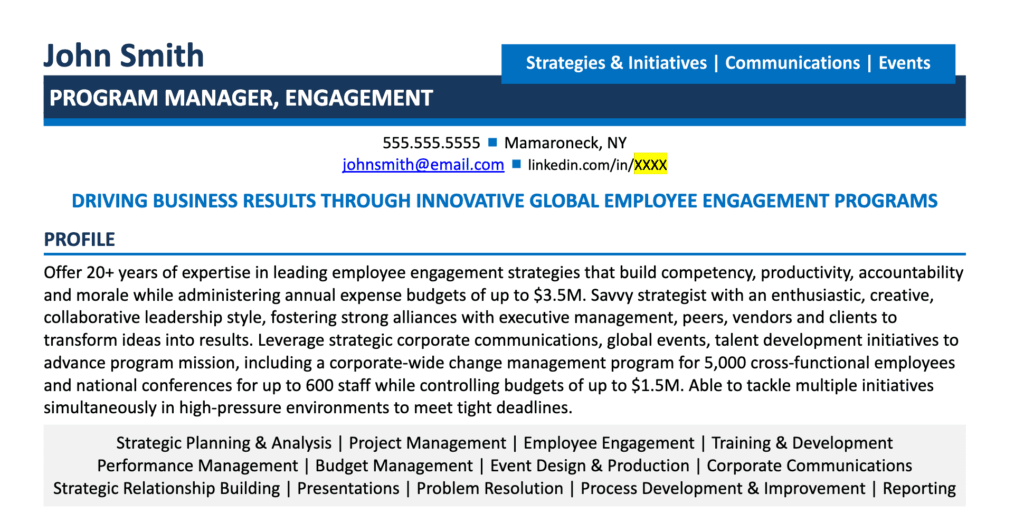
Adding a line to your resume is a simple process that can make a big difference in how it looks. Follow the steps above, and you’ll have a professional, polished resume in no time.
Conclusion
Adding a line to your resume is an easy way to make it look more polished and professional. By following the steps in this guide, you can add lines to your resume quickly and easily. Remember to always proofread your resume before you send it out, and make sure to use a font that is easy to read. With a little bit of effort, you can make your resume stand out from the rest.
This article has outlined a few methods on how to insert lines in Word, as well as how to use the horizontal line border feature. If you’re still having trouble, or if you have any questions, feel free to book a complimentary resume consultation, and we’ll be happy to help.
FAQ
How can I make my resume look better with lines?
There are a few different ways to add lines to your resume. You can use the built-in line feature in Microsoft Word, or you can use a horizontal line border. To add a line using the built-in feature, simply place the cursor where you want the line to appear and press the “Enter” key. This will create a new paragraph. Type out the text that you want to appear on the line, and then save your document.
Can I add a line after all of my text?
Yes, you can add a line after all of your text by using the horizontal line border feature. To do this, click on the “Home” tab and select the “Paragraph” tool. Then, click on the Borders button and choose Horizontal Line. This will insert a line after all of your text.
How do I remove a line from my resume?
If you want to remove a line from your resume, simply click on the line and press the “Delete” key on your keyboard. Alternatively, you can select the No Border option from the Borders drop-down menu.

